Sparkling Saturdays: Shaker Party!


Welcome to another Sparkling Saturday! A friend recently requested I make a birthday card for her to send to her best friend overseas, so I wanted to make something that was cheerful and fun. She told me that her friend's favorite color was orange, so therefore I chose some colors that I thought would go well with orange.

I started out with a piece of white cardstock that I die cut using Mama Elephant Femme Frames. I also die cut a circle on the left side to turn it into a balloon. The adorable and cute animals from the Mama Elephant Carnival Cupcake set were then colored using Copics and Spectrum Noirs alcohol markers. Following, I stamped and colored a bunny from The Greeting Farm Lucky Bunnies stamp set and fussy cut it out. Using foam squares, I set it on the card and drew a string connecting the bunny's paw to the balloon.


The background wasn't looking quite festive enough, so I stamped some loose confetti all around the card using various inks. For my shaker portion, I put a piece of acetate behind the balloon and then I adhered a piece of fun foam to the back of this pane. After adding in some sequins (looking back, I should have added even more!) I popped it up onto a turquoise piece that I die cut using the same ME Femme Frame set. I adhered this onto an orange side folding A2 card base and it was finished!

PS: Since I didn't have orange sequins, I used an orange Sharpie to color in the PPP Sparkling Clear sequins!

I hope you enjoyed. I'm entering this into Simon Says Stamp Wednesday Challenge: Anything Goes!

Happy Crafting.

Messy Mondays: Happy Showers


Welcome to another Messy Monday! I recently attended a friend's baby shower so obviously I made a card to go with the present (sidenote: shopping for baby clothes is so much fun- the clothes are so cute and adorable!).

For this card, I used a piece of baby themed pattern paper for the top half of my card. Using the rattle from Lawn Fawn Hello Baby stamp set, I used Versamark to make my own background on the bottom half of my lime green A2 card base. After that was done, I let it dry and then adhered the pattern paper on top.


Following this, I added a pale blue thin ribbon across the card front where the pattern paper ended to add a bit of texture and dimension. For my focal panel, I die cut the large circle from Mama Elephant Sew Fancy set and glued it to the left middle side of the card. The penguin from Avery Elle More Stories was colored using Copics (C1, C3, C5) and fussy cut out. I added it on top of the circle using some foam adhesive.

Finally, the sentiment (I smudged it a bit with my hand! Argh.) from the Hello Baby set by Lawn Fawn was stamped in the bottom right side and some Pretty Pink Posh sequins in 4mm and 6mm Sparkling clear were added for the finishing touch.

Hope you enjoyed. I'll be entering this into the SSS Wedsnesday Challenge: Wrap it Up.

Happy Crafting.

Sparkling Saturdays: 1 card design, 3 cards


Welcome to another Sparkling Saturday! Today I will be sharing with you 3 sparkly fall cards. There are lots of techniques I used in making this card and I'll try my best to share some tips along the way. Hope you enjoy!

Firstly, I used this gorgeous fall stamp set by Inkadinkado (Autumn Foliage) for the leaf image. I selectively inked the bottom half of the leaves using my Versamark ink so I could flip it sideways to make it into a branch. The image was pretty easy to selectively ink without masking, and any bits I didn't want stamped on, I used my finger to wipe off. Another tip that worked for me was to fill in little gaps by using my Versamarker. I heat set this image using sticky embossing powder by Judikins. This powder makes the image tacky and allows for foil/glitter to be adhered to it.

In this card, I used Martha Steward fine glitter in Peridot on top of my embossed leaves. Not going to lie, it was a bit messy, but using the backing of sticker sheets on top of the glitter and rubbing it down with my bone folder really helped the glitter to stick. I used a Swiffer duster to clean up stray glitter. An extra step I did to make sure the glitter did not rub off was to stamp over it again with Versamark but emboss it this time with clear embossing powder. This ensures the glitter is trapped in.

To finish this simple (looking) card, I used the congratulations stamp from the Sentimental Borders set by Mama elephant and repeatedly stamped it in the middle third of the card using Simon Says Stamp ink in Fossil. Since the leaf image was embossed, it resisted the ink so no masking was needed. A sentiment was stamped in black and then the panel was adhered with foam tape to an A4 card base.


For a more whimsical look to this card, I did two other variations. For this first variation, I used an acorn from Lawn Fawn. I colored it in using copics (E13, E15, E37) and fussy cut it out and adhered it on the branch using foam squares.


For another look, I stamped the superhero owl from Lawn Fawn and also colored it in using copics (E11, E13, E15, E33, E37, E39, BG 10, BG13). After I fussy cut it out (and went over the outside with a black marker for a more finished look!), I adhered it onto the branch using foam squares. I was so happy that the owl fit perfectly in the shape of the branch.

There you have it. 3 different cards for the same basic card design and hopefully some helpful tips along the way. Let me know if you have any questions in the comments below. Until then, thanks for reading this long post.

Happy Crafting.

Messy Mondays: Congratulations (house warming)


Welcome to another Messy Monday (Tuesday...hehe)! It was Thanksgiving here in Canada yesterday, so I took the day off to spend time with family and friends, but am back today with a new post.

I have so much to be thankful for this year but am extremely grateful for the new opportunities God has granted me these past couple of months and for the loving encouragement of my friends and family.

Today I will be sharing with you a card I made for my friends' house warming. If you follow me on instagram, you will see the gift I put this card in.


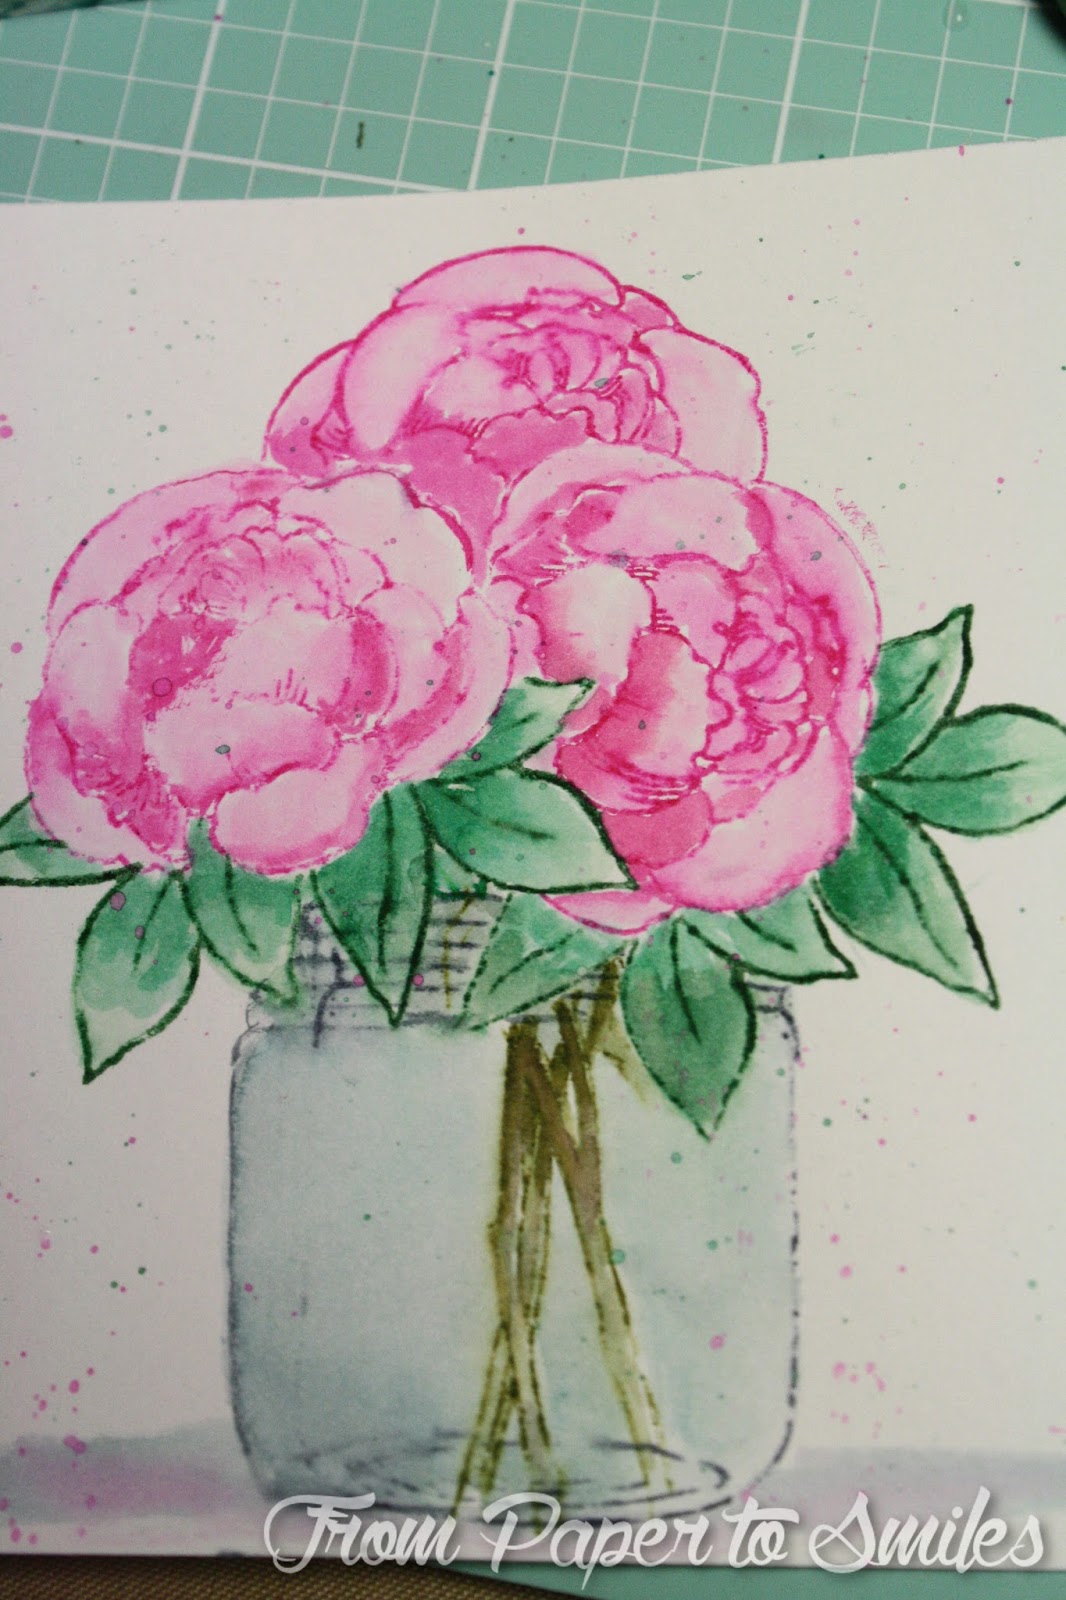
I started out with a piece of Canson XL watercolor paper and used the smoother side to stamp on some images from Stampendous Bouquet for You set. A mask was created for the peony and leaves so I could layer the flowers on top of another to make it look like a bouquet. As the mason jar in the set is taller and skinnier than I wanted, I selectively stamped and expanded the jar to what I wanted it to look like.

All the images were stamped and watercolored with distress ink markers. The colors I used were Picked Raspberry (peonies), Weathered Wood (jar and shadow), Peeled Paint (stem) and Pine Needles (leaves).

After the image was colored, I rounded the corners with my WRMK corner chomper and adhered it to a blue-grey cardstock. As you can tell from my last post, I am currently in love with these foiled card bases, so I adhered this one to a damask-like pattern (someone tell me if this pattern has a specific name!). 'Congratulations' by Paper Smooches was die cut of black cardstock and glued onto the card.

Simple and easy. I will be entering this card into the Simon Says Stamp Monday Challenge.

Thanks for coming by, I appreciate it. Happy crafting!

Sparkling Saturdays: Whoosh! Pow! Shine!


Welcome back to another Sparkling Saturday! Today's card is a stunner. When I say that, I mean it may literally blind you with its shine (hopefully not though!). As you can tell by the picture, the shine reflects off the wooden table. It's pretty crazy.

I started out with a piece of teal colored cardstock cut at 3.5" by 5". The buildings were layered and cut out using Cityscape dies by Mama Elephant to give more dimension to the card. Next, the sentiment was stamped on from Make a Wish stamp set from Mama Elephant so I could get a better placement of where to put my stars.

For my 'whoosh' of stars, I used a full adhesive sticky note to mask off a flowing line. I used Tsukineko Encore Ultimate Metallic Gold to stamp the stream of stars inside the Tiny Heroes set also by Mama Elephant. At the top of the stream of stars, I Copic colored and fussy cut out a superhero from the Tiny Heroes stamp set and foam taped him on. After that was done, single stars were used to fill up the remaining spaces (Make a Wish stamp set).

To put my card together, I adhered a black piece of cardstock behind my focal panel and then added it to a silver foiled card base. The card base is from when I bought a box of 60 foiled cards from Michaels when it was $7 because I could not resist. They are seriously so pretty for any occassion!

Hope you enjoyed the card and the shine! Happy Crafting.

Messy Mondays: Hidden Number


Welcome to another Messy Monday! As you may have seen on my instagram, I recently watercolored some panels for The Daily Marker 30 Day Coloring Challenge. Today I will be sharing with you a card that I made with one of them.

I first started out with a watercolor panel measuring 3.75" by 4.75". I used Lawn Fawn Finley's 123 die cuts and made stamps with the using foam. You can see how I did this here. Next, I used Versamark to stamp out the numbers (minus the 2 and the 8), and then heat set them with Hero Arts white embossing powder. Distress ink pads in Spiced Marmalade, Ripe Persimmon, and Festive Berries were used to watercolor the background. After it was dry, I stamped on the numbers '2' and '8' using SSS Fossil ink.


The cute little otter holding the present image is from Lawn Fawn Year 5 stamp set. It was colored in using Copics in W1, W3, and W5. The present was colored in using some green Spectrum Noir alcohol markers. I fussy cut out these images and used my X-acto knife to go around the little hand so it could hold the present. This image is too adorable!

For the greeting, I used some stamps from Mama Elephant Three Amigos set. The otter was adhered beside the greeting using some foam squares. I adhered this panel onto some brown cardstock and placed it on a bright green A2 side folding card base. For a bit more interest, some water and orange splatters were used to finish up this card.

Hope you enjoyed! Do you know the age of the person I gave this card to? Haha.

I will be entering this into this week's Color Throwdown. Happy Crafting.

Sparkling Saturdays: Penny Spinner card for WCMD 2015


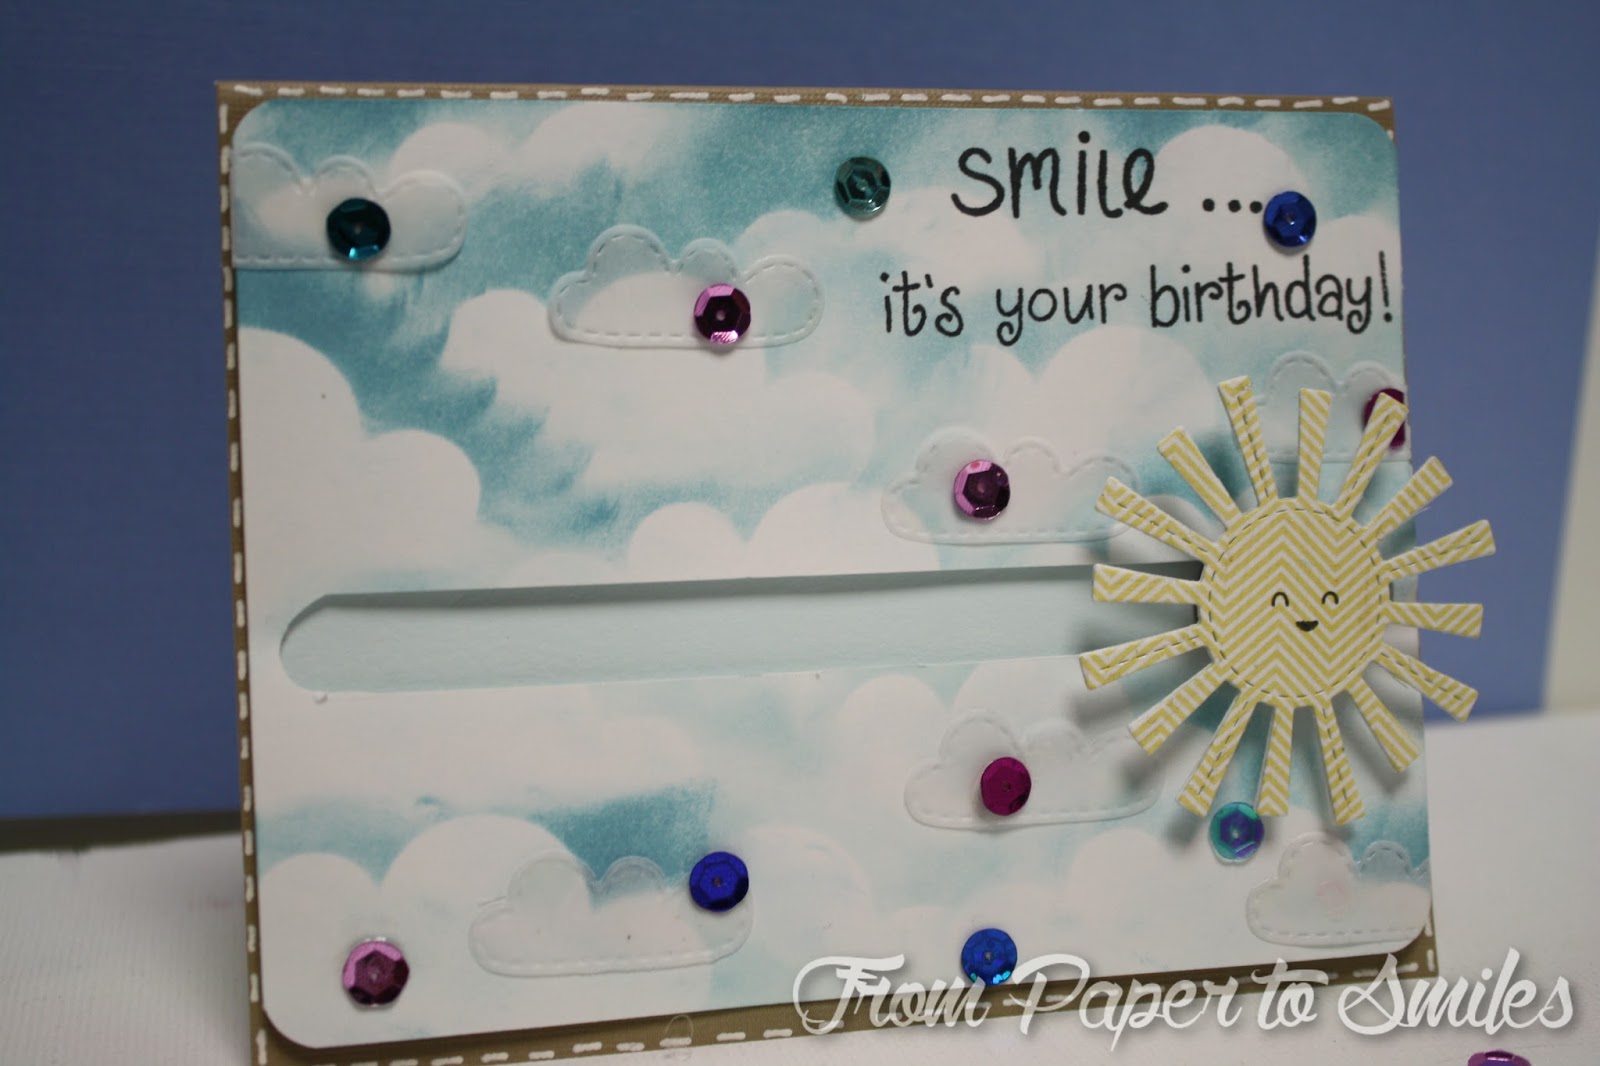
Welcome to another Sparkling Saturday! Today is world cardmaking day and I've had so much fun watching people craft on periscope and instagram. I managed to make an interactive penny slider card today and I hope it makes you smile.

I started out with a piece of white card stock that was cut slightly smaller than a standard A2 card front. Using some post-it notes, I die cut the clouds from Lawn Fawn Spring Shower set so I could use it as a mask/stencil for making my own cloud background. I used Tumbled Glass and Salty Ocean distress ink for the background, and kept moving the masked around until I got what I wanted.

For my slider portion, I used my T-squared ruler to make a straight line across where I wanted my sun to slide. I used my smallest circle punch on both ends of my line. After that was done, I used my X-acto knife to cut out the 'track'. There are die cuts/punches that can do this for you, but since I don't own any, I decided to cut it out myself.

After the track was done, the sun was die cut from the same Lawn Fawn set out of some yellow chevron patterned paper. I stamped on a little face from another Lawn Fawn set and added some Wink of Stella for some extra sparkle.

Next, I sandwiched two pennies together using a piece of round foam tape. Some trimming may be required for it to roll nicely on the 'track'. After testing it out, I stuck on my sun using double sided adhesive and slid the back penny behind the track and the front penny in front of the track. You can see this in action on my instagram.

The greeting was stamped using the Year Three Lawn Fawn set and adhered using foam adhesives (so the slider won't get stuck!) to kraft colored card stock. I finished off  this card with some sparkly sequins and vellum die cut clouds.

I hope you enjoyed this card. Share with me what you made or did for World Card Making Day. I am going to enter this card into the Simon Says Stamp Wednesday Challenge: Anything Goes. You should too!

Happy Crafting.