Sparkling Saturdays: Christmas Card Series #12

Welcome to another Sparkling Saturday! Hope you all had a wonderful Christmas and got to spend some time with family/friends. Christmas is always a special time for me as it celebrates the birth of Jesus and is a great reminder of His great, unconditional love for us.

Today is the also the last card of my Christmas card series. I hope you enjoyed :) Although it's past Christmas, this card can be given during the winter season for birthdays, New Years, or a belated Christmas card. It also has minimal stamping, so it can be done easily for anyone who does not have a lot of stamps.

I started out with a side folding light pink A2 card base. Next, I cut out a textured foiled piece of fuchsia cardstock and taped down a piece of white satin ribbon near the bottom. After, I adhered it onto a piece of white cardstock and stuck it down onto the card base.

As the foiled fuchia cardstock is pretty eyecatching, I decided to keep everything else simple. I used my Cricut to die cut and glued on a white snowflake, then used Ranger Stickles in Stardust to give it a bit of sparkle. Next, I used a Martha Stewart star punch on a metallic silver piece and used foam tape to adhere it to the middle of the snowflake.

For my greeting, I stamped it in black on the same silver metallic cardstock and taped it on top of the ribbon on the right side.

Hope you enjoyed this series! I'll be entering this into SSS: Winter Wonderland and Make it Sparkle Challenge.

Happy Crafting.

Messy Mondays: Christmas Card Series #11


Welcome to another Messy Monday! I'm going to try to squeeze one more card in before Christmas hits, so stay tuned for an extra post this week since I missed last Saturdays due to a Christmas party.

This fun Christmas card is not only cute and adorable, but super easy to whip up and mass produce as well. I used all the penguins from the Artic Penguin Mama Elephant set and stamped them all over randomly on a piece of 110lb white cardstock. I used my MISTI to stamp them down all at once and it was easy making multiple cards this way, but if you don't have a MISTI, this will still work.

After all the penguins were stamped, I chose one penguin to stamp on a separate piece of cardstock to copic color and fussy cut out. After, I adhered this on using some foam squares for some added dimension and pop of color.

For my sentiment, I used the gorgeous Happy Holiday die from Neat and Tangle and cut it out from a piece of red cardstock that I stuck onto a double-sided adhesive sheet. It made adhering this delicate word die cut super easy and fast.

To finish this card,  I adhered it to a white side folding card base and stamped a Christmas sentiment on the inside.

Hope you enjoyed! I'll be entering this in CTD 373 and Simon Says Stamp Wednesday Challenge: Die Crazy.
Happy Crafting!

Messy Mondays: Christmas Card Series #10


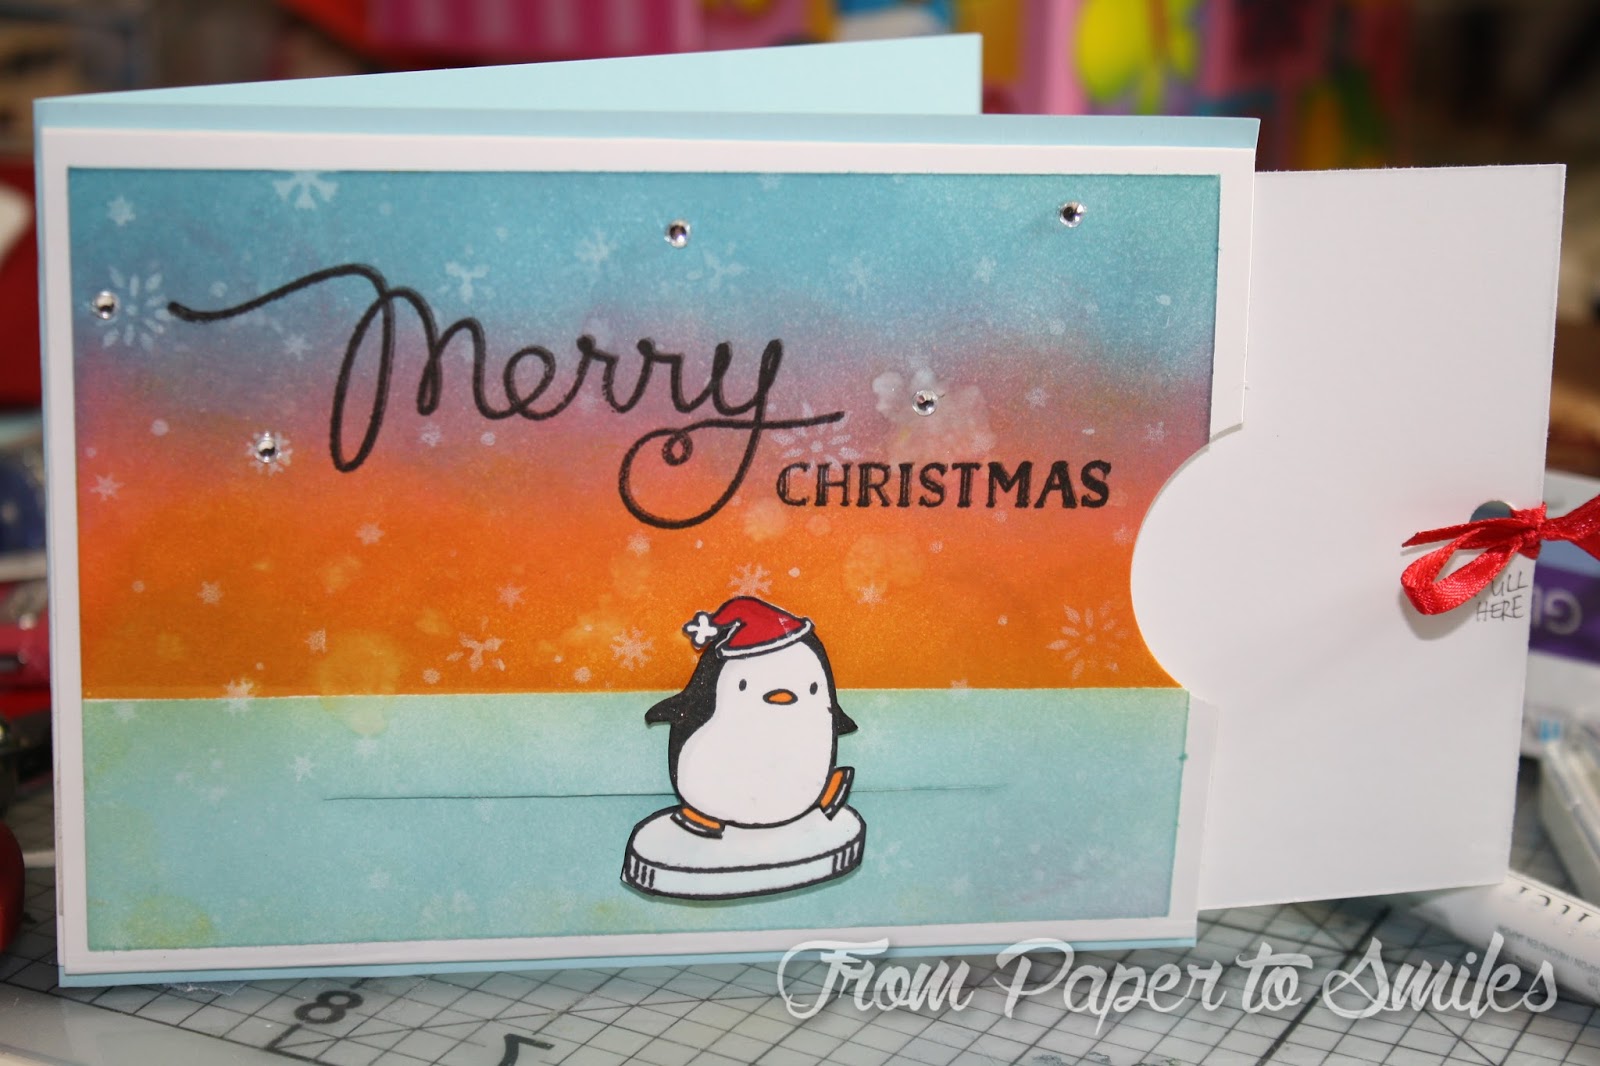
Welcome to another Messy Monday! I'm feeling a bit under the weather today, so this will be a pretty short post. Today I will be sharing with you a fun interactive card that I made.

For the background panel, I used various distress inks and masking to blend together a sunset kind of sky. I made this background panel into a pocket by leaving the right side of it open so I could put in a slider piece.

For my slider image, I used a penguin from Mama Elephant Artic Penguin set and Copic colored and fussy cut it out. The sentiment is from the Jolly and Merry stamp set also by Mama Elephant.

To finish off this card, I stamped on some white snowflakes on my background and added some diamond sticker gems to the middle of them.


Hope you enjoyed seeing it in action! I'm going to put myself back to bed now to rest.
Happy Crafting.

Sparkling Saturdays: Christmas Card Series #9


Welcome to another Sparkling Saturday! Today I will be showing you 2 versions of a same card design, one being more sparkly, and one a little less. For the cards, I used Mama Elephant Femme Frames to die cut the stitched rectangle and the scalloped rectangle.

I started off each card by diecutting a wreath out of green cardstock using Memory Box Holiday Wreath. For the first wreath, I used a similar Copic marker in green to add some depth to the wreath and then covered it with some clear Wink of Stella for that extra sparkle.

For the first card, I stamped and gold embossed the small deer from Mama Elephant Winter wonderland in the middle of the wreath. Underneath the wreath, I stamped a greeting from the same set, and then added some clear sparkling sequins to finish off the card.


For the second card, I Copic colored and fussy cut out a fox from Avery Elle More Stories and adhered it onto the bottom of the wreath using foam squares. For a little bit of sparkle, I used red gem stickers on the wreath in place of holly. Using the same Mama Elephant stamp set, I stamped a different greeting on this card to finish it off.

Hope you enjoyed.
Happy Craftin!

Messy Mondays: Christmas Card Series #8


Welcome to another Messy Monday! Today is card #8 in my Christmas card series. I will be sharing another card made using my Cricut.

First, I used a faux-burlap cardstock and cut out a fancy frame using my Cricut. Next, I used a dark green piece of cardstock and cut out the exact same frame but 1" smaller. For the background, I used a piece of red polka dot paper and adhered it behind the smaller frame. For the larger frame piece, I used red/white twine and wrapped it a couple times around the left side and added a jingle bell. Using foam tape, I taped down the faux-burlax piece onto the dark green piece.

For the embellishments inside the frame, I die cut a snowflake using my Cricut and decorated it with Stickles Frosted Lace. For the centre star, I punched it out of silver paint chip card using my Martha Stewart punch.

To finish off the card I stuck this panel down on a piece of white cardstock that was slightly larger and then adhered this all down to a dark green horizontal top folding A2 card base. I added a sentiment on the top of the frame and a silver sparkling sticker gem to the middle of the star.

Hope you enjoyed!

Happy Crafting.

Sparkling Saturdays: Christmas Card Series #7


Welcome to another post in my Christmas card series! What's Christmas without some fun shaker cards? Today I will be sharing with you a snowglobe shaker card that I made, so let's get started!

First, I used the largest rectangle from Large Stitched Rectangle set from Lawn Fawn to cut out my focal panel. Next, I used the Grand Snow Globe die set from Memory box to cut out my globe, and used deep red cardstock to die cut out the base.

Using a white A2 side folding card base, I used the focal panel to lightly trace the globe shape onto the base so I would know where to set my image. I stamped out the ice and the penguins (Artic Penguins by Mama Elephant) by doing a bit of masking and then left the masks on while I made the background. I used distress ink to blend a snowy background and used water to pick up some color. I wanted some shine onto this background so I added some splatters using Brushed Pewter distress spray. I colored the penguins using Copics and also added a mistletoe in between them. For my greeting, I used the trees and a sentiment from Lawn Fawn Snow Day stamp set.

To make my shaker, I traced out my globe onto a piece of white fun foam and cut it out. I adhered a piece of acetate behind my glove and then added the foam piece using some double sided adhesive. I filled the globe up with red, silver, and white glass beads and then adhered my card onto it carefully.

The card can now be shaken! What fun :) Thanks for dropping by. I hope you enjoyed. I will be entering this into Simon Says Stamp Wednesday Challenge: Let it Snow.

Happy Crafting.

Messy Mondays: Christmas Card Series #6


Welcome to another Messy Monday! Sorry that this post is a bit late...I passed out yesterday after coming home as I had a busy packed weekend. Can you believe it's already December! Ahhh! 24 days until Christmas :) To help you get motivated to start making and sending out Christmas cards, I will be sharing a rustic Christmas card today on the blog.

For my focal panel,  I used a piece of white card stock cut at 3.5" by 5.25"and stamped it with Impression Obsession Cover-a-Card Screen stamp using some Distress ink in Frayed Burlap. Next I used Hero Arts Holly Jolly stamp set to stamp a holly with the berries. I wanted to add some dimension to this flat card so I used my red Sharpie to color in some white pearl stickers, and stuck them on as the berries. I also went over the holly with glossy accents so it gave the card some shine.

For my greeting, I die cut Christmas Blessings from Simon Says Stamp and adhered it down using Ranger multi-matte medium and held it down with an acrylic block while it dried. After everything was dried, I stuck the focal panel down onto a A2 side folding kraft card base. For a finishing touch, I added some green striped washi tape on the sides.

Hope you enjoyed! I will be entering this into the Simon Says Stamp Monday Challenge: Gentlemen.
Happy Crafting.