Messy Mondays: Christmas Card Series 2016 - Day 5

Welcome to Day 5 of my Christmas Card Series! Today is another variation of a card I made from last year with some different design changes. You can see those cards here. I wanted to make a version that was still pretty but easier to mass produce (if you need more than 1), and simpler if you need a card in a hurry. 

I started out with a basic A2 top folding white card base. For the focal image of my card, I used deep green cardstock to die cut the Memory Box Holiday Wreath. It dies cuts beautifully and comes out super easy as there are no little pieces to poke out. I adhered the wreath on using my Tombow Mono Liquid adhesive (did any of you catch their 40% cyber monday deal?). I decided not to die cut out the berries because it would be too labor intensive but instead used my red Copic marker to color in some silver gem stickers I had and stuck them on as the holly berries. (TIP Alert: Silver is the best color to buy for gems because you can color them with any permanent/alcohol marker to whatever color you need them to be!). 

Next, I used the hedgehog from Avery More Stories and colored it in using warm grey Copic markers (W1/W3/W5) and added a red scarf from a Lawn Fawn set for a more festive look. I fussy cut it out and foam mounted it at the bottom centre of the wreath. 

For my sentiment, I die cut a banner from Mama Elephant Basic Set Creative Cuts and stamped on a greeting from Mama Elephant Winter Wonderland set. Using my WRMK corner chomper, I rounded both bottom corners to finish off my card.

Hope you enjoyed! I'll also be entering this into SSS Wednesday Challenge: Christmas to die for.
Happy Crafting. 

Sparkling Saturdays: Christmas Card Series 2016 - Day 4

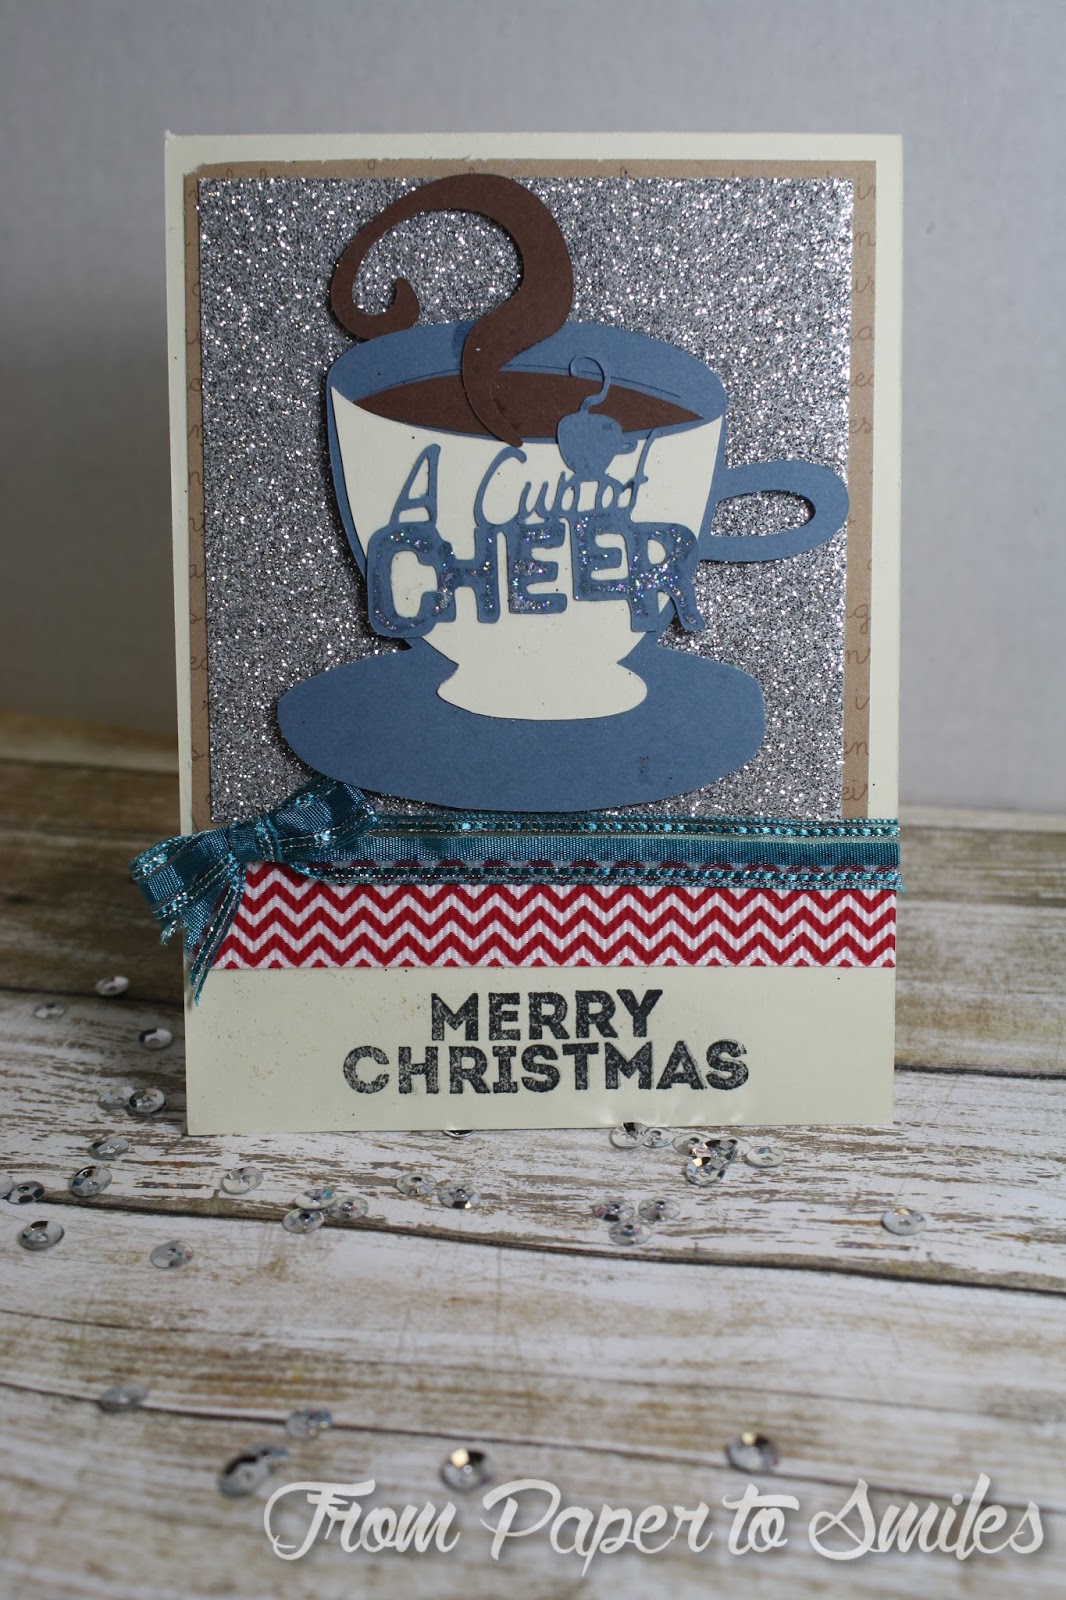
Welcome to another Sparkling Saturday!  Today I will be sharing card 4/12 in my Christmas Card Series. This card is mostly made with my Cricut (for those who have one and need some ideas on how to use it), but you can make this with similar dies or stamps that you fussy cut out. 

First, I used my ruler to figure out how big I wanted my image to be and then adjusted the size on my Cricut. I used my Winter Frolic Cartridge for this particular image and chose to also cut out the shadow, "cocoa", the steam coming out from the cocoa, and a greeting as well. It took a few trial and errors, but after I figured out the right dimensions, this card was easy to mass produce as well.

After cutting out all my parts and adhering them together using my quickie glue pen, I adhered this focal image onto a  piece of silver glitter cardstock. Following this, I matted it onto a similar cocoa colored pattered paper and adhered it down onto a top folding A2 cream colored card base.

For my finishing touches, I added a strip of red chevron ribbon, and tied a bow using a blue sash ribbon. I stamped on an additional greeting and added some silver Stickles onto my word 'Cheer' and this card was finished!

Hope you enjoyed. I will be entering this into SSS Wednesday Challenge: Christmas to Die for.
Happy Crafting! 

Messy Mondays: Christmas Card Series 2016 - Day 3

Welcome to another Messy Monday! Today is Day 3 of my Christmas Card series, and I'm happy to share with you a clean and simple card for the holiday season. Let's get started.


This card is easy to mass produce if you prep all the cardstock before hand. I cut red cardstock to be my A2 card base, green card stock for my matting piece, and white cardstock for my focal panel. After cutting all of these out (depending on the number of cards you're making!), it becomes easier to assemble. 

First, I started with my focal panel and stamped on a wreath and bow using Avery Elle Winter Wreath set. This set also comes with hollies and acorns to stamp on as well, but I chose not to use them in order to save time and I liked how it looked plain. Next, I stamped on a sentiment underneath the wreath using the same colored ink as the bow for a cohesive look. Finally, I die cut the word Blessings from red cardstock using the die set from SSS Christmas Blessings. I adhered the word on using my quickie glue pen.

After the focal panel was done, I matted this with the green piece and then adhered all of it down onto my side folding red card base. If you want, you can add some sequins, jewels, or glitter, but I chose to keep it simple for this card.

Hope you enjoyed!
Happy Crafting. 


Sparkling Saturdays: Christmas Card Series 2016 - Day 2

Welcome to another Sparkling Saturday! For card 2/12 of my Christmas Card series, I decided to reuse one of the designs I thought of last year. It's been one crazy week with not as much sleep as I need and want, so forgive me for not thinking of a new design! Many may not know the time that goes into planning and thinking of a card design, but it definitely takes me more time to think of how I want to make a card than making the card itself.


For this card, I kept all the main elements of last year's card the same, but changed up the critters. I used a A2 red cardbase, a blue piece of cardstock sprayed with glitter, and used the Basic Set from Mama Elephant to die cut out the banner. I also used a die from Mama Elephant Lawnscape trio to cut out snow slopes for my cute critters to sit on. Click on the links given to read in more detail how I made the basic elements of the card.

For my adorable critters and pretty sentiment, I used the Snow Day set from Lawn Fawn. I love how the grey bunnies turned out with my Copics! I die cut these out with an additional tree stamped in green, and added some sticker gems for 'ornaments'. After adding a couple sequins and stitched line around the blue panel, my card was finished.

Thanks for reading. I'll be entering this into SSS Wednesday challenge: Christmas Critters
Happy Crafting!

Messy Mondays: Christmas Card Series 2016 - Day 1


Welcome to another Messy Monday! I'm so glad you could join me today in my first Christmas card of the season! There will be a total of 12 cards that I will be sharing with you this season, so I hope you'll stay tuned.

For my first card, I will be sharing with you a clean and simple design that was super easy to reproduce. I cut out a stack of white card fronts beforehand to expedite the process. First, I used this cute deer and snowball stack from Lawn Fawn Toboggan Together stamp set and stamped it on my white card panels. You can either use your MISTI to make this process go faster, or stamp it by hand as the exact placement of this doesn't matter too much for this card.

Next, I took a post it note to mask my snowballs and deer so I could lightly blend on some Tumbled Glass distress ink for my background. After all this was done, I used my Marvy Snow Marker to draw on the snow. I love how this puffs up when it gets heated up! So much fun. I may be addicted to this. Bear with me if you see this used a lot in future cards.

For my sentiment, I used SSS Lipstick Red to stamp it on. It's the perfect cheery red color for Christmas! I colored in all my reindeers with Copic markers, and used a white gel pen for my snowballs. For some extra sparkle, I used my clear Wink of Stella and brushed it all over my background. Finally, I adhered all of these card fronts onto red top folding card bases and these cute cards were done!

I hope you enjoyed Day 1 of my Christmas series. I'll be entering this into the Lawnscaping Challenge.

Happy Crafting.